How To Use A Sound Wall In The Classroom – FREE SOR Guide
This post may contain affiliate links, and I will earn a commission if you purchase through these links. Please read the disclosure policy for more details.


It’s time to ditch word walls for sound walls. Sound walls are based on the science of reading, and are an excellent way to explicitly teach phonemes. They are highly effective, especially for struggling readers, and make a lot more sense than word walls. Sound walls can be used in primary grades and with older students. The sounds you display may differ at times with different groups, but a sound wall is helpful for all ages.
SCIENCE OF READING QUICK START GUIDE
Grab your FREE guide with the 5 tools you need to get started with SOR!
*Most school spam filters block my emails, so please use a personal email.

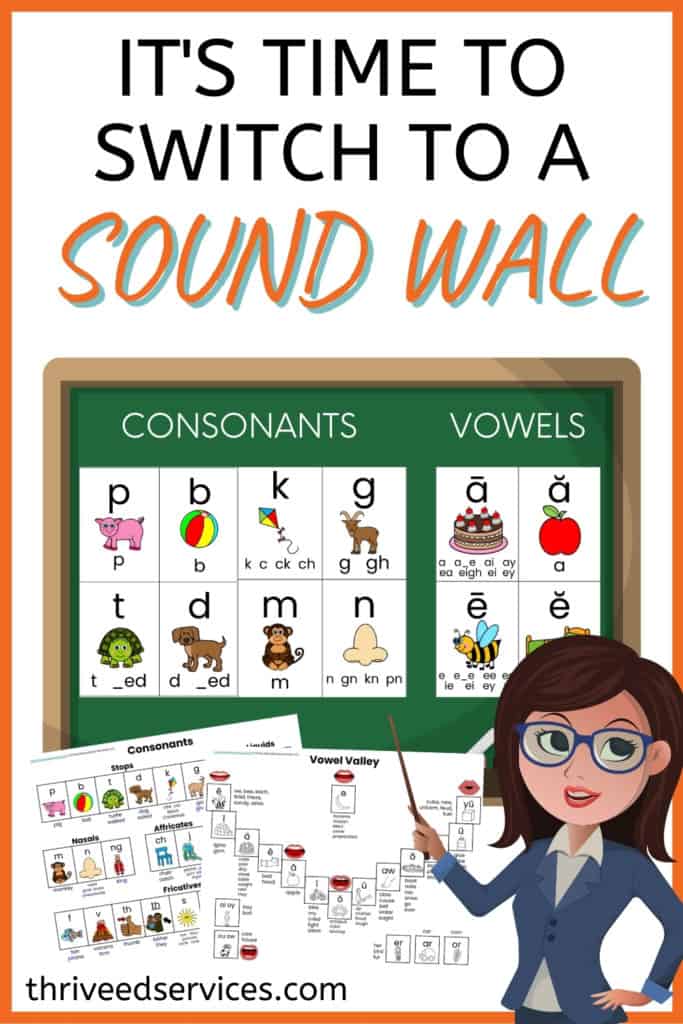
What is a sound wall?
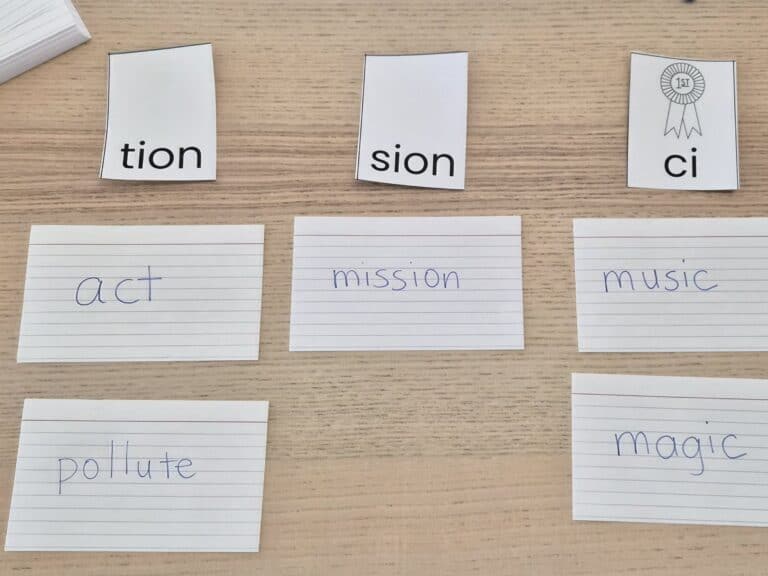
A sound wall is a place where the different speech sounds (phonemes) are displayed. Instead of the traditional word wall, where words are displayed on a wall organized by their first letter, you display the different speech sounds using phoneme cards and organize words based on their sounds.
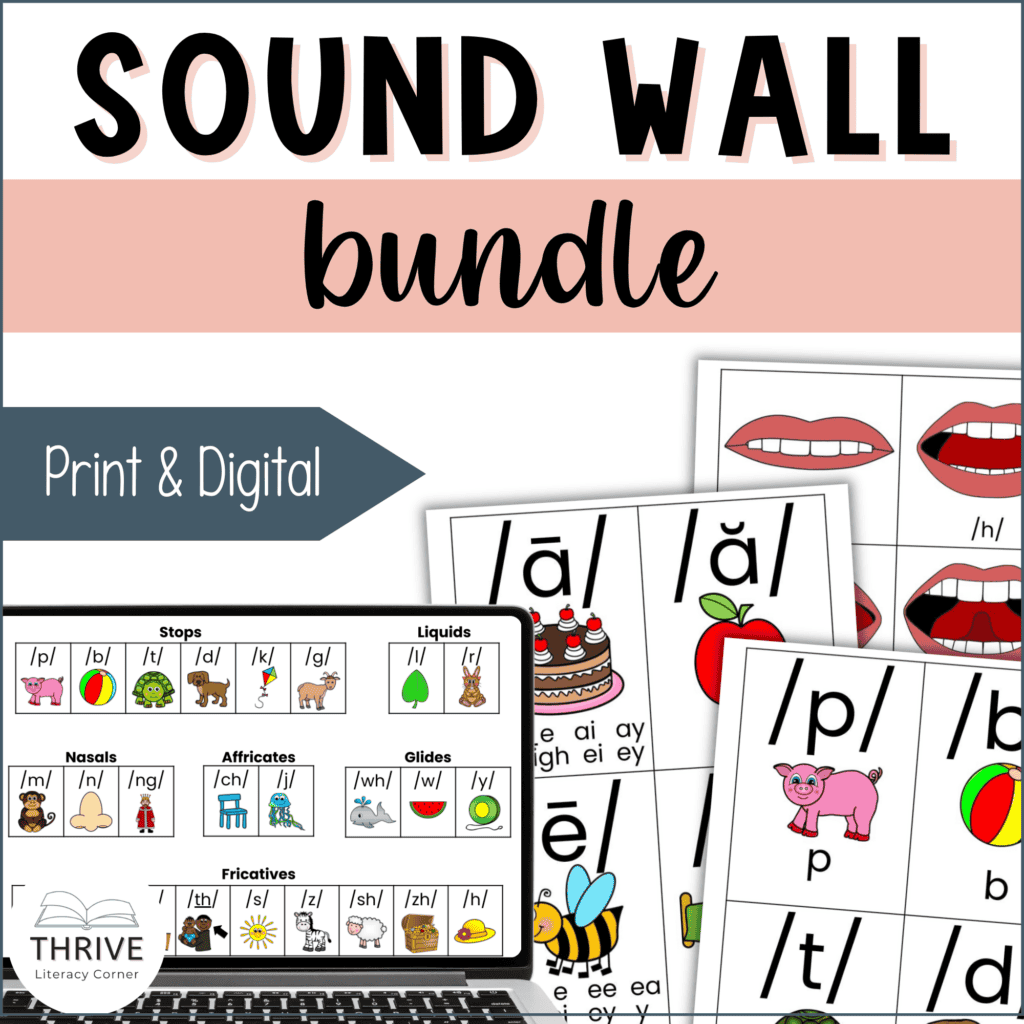
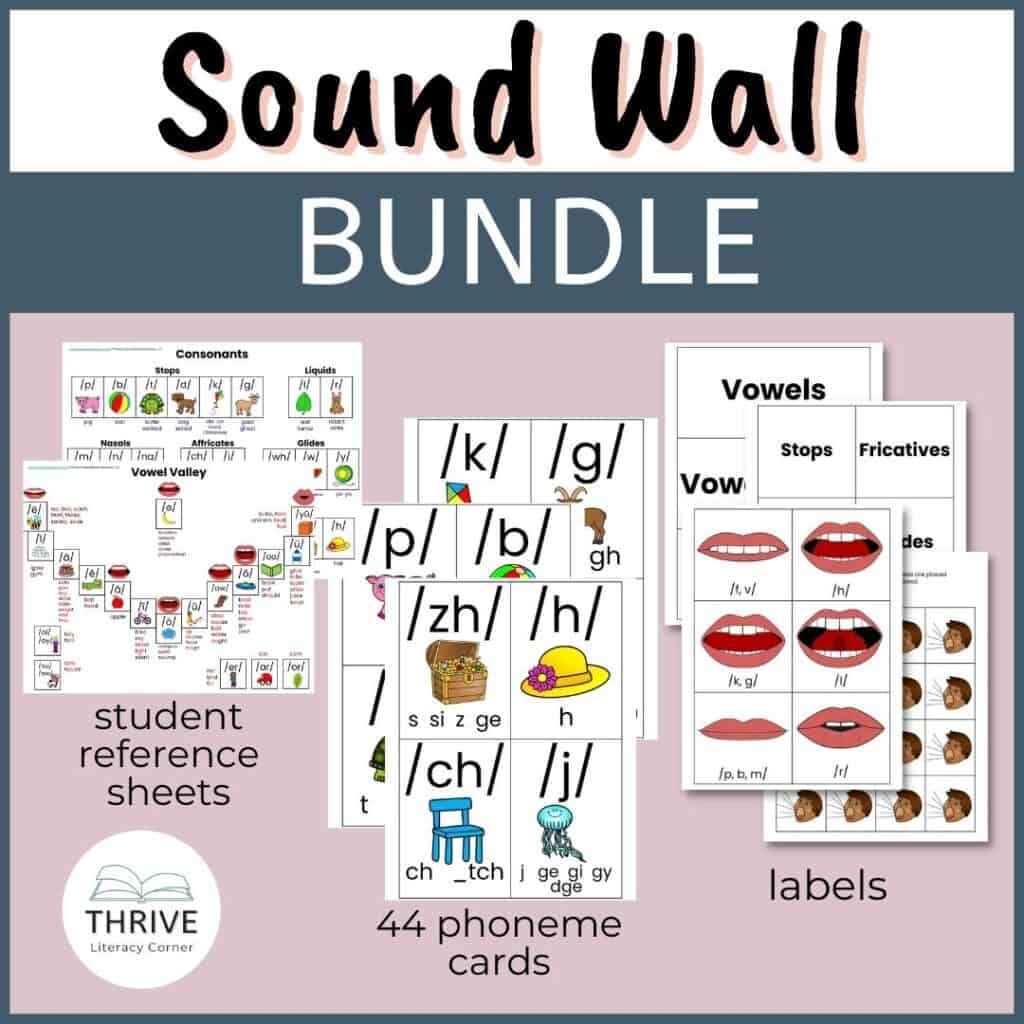
The phonemes are often displayed in specific groups, but they don’t have to be. There is a consonant sound wall and a vowel sound wall, sometimes called a ‘vowel valley’. Often, a list of the different spellings for each sound is included under or next to the phoneme cards, and sometimes a word list is also included. Good sound walls also include mouth formation visuals so students can see what their lips, teeth, and tongue should be doing to make that sound.

Benefits of a sound wall
Again, I refer back to the science of reading. Students need to master phonemic awareness to become fluent readers. Matching speech to print is critical and a sound wall is one of the best ways to support this.
Benefits of a sound wall include:
- explicit instruction of phonemes
- builds orthographic mapping
- provides consistent review of sounds
- provides a visual reference for students in the classroom
- improves spelling
- improves decoding
Why a sound wall is better than a word wall?
Grouping words by their sounds instead of letters is more effective at teaching reading and spelling. Students learn that one sound can be made using different graphemes, and it helps to teach spelling patterns. In 2000, The National Reading Panel found that explicitly teaching phonemes was a critical component of effective reading and spelling instruction.
Louisa Moats, the author of Speech To Print (which I highly recommend all reading teachers get a copy of), states that “without awareness of the speech sounds that letters represent, one cannot match letters to sounds and read unfamiliar words.”
How to introduce a sound wall
Sound walls can be introduced at any time, and the sooner the better! You introduce a sound wall using the sounds your students already know, even if it’s just a few.
How to set up the phoneme sound wall cards
Put up the phoneme cards for the sounds they know, and list the different spelling patterns for that sound by the card. With your students, add familiar words using those spelling patterns for that sound under the card.
There are voiced and unvoiced consonant sounds, and then you also have vowel sounds. Voiced sounds are the sounds made from the voice box. unvoices sounds do not vibrate the vocal cords. Say the /s/ (unvoiced) and /z/ (voiced) sounds and you will notice the difference.

Consonant Sounds
Stops – puff of air comes our of your mouth when making these sounds
Unvoiced: /p/, /t/, k/
Voiced: /b/, /d/, /g/
Nasals – you feel these vibrate inside your nose
/m/, /n/, /ng/
It’s recommended to keep nasal sounds out when segmenting words because of how it changes the vowel sound, making it a more nasal sound.
Fricatives – lots of vibration and ‘skinny air’
Unvoiced: /f/, /th/ (thumb), /s/, /sh/, /h/
Voiced: /v/, /th/ (this), /z/, /zh/ (treasure)
Affricates – in between a fricative and stop
Unvoiced: /ch/
Voiced: /j/
Glides – very airy
Unvoiced: /wh/ (more common in British English)
Voiced: /w/, /y/
Liquids – feel like they fill your mouth up
/l/, /r/
These attach to vowels and alter them, so try not to use them when segmenting.

Vowel Sounds
There are 19 vowel sounds, and they are usually represented in a V shape to mimic the motion of your chin as you make these sounds.
This is better represented in an image so reference the Vowel Valley charts above and below to see the sounds.

How to use a sound wall in the classroom
Once you have set up your sound wall, you can introduce new sounds explicitly.
1. Introduce one sound at a time.
The specific order doesn’t really matter, but you can use this as a guide. The key is not to introduce multiple sounds at once.
5 questions to ask when introducing a new sound
There are a few questions you want to ask about sounds when teaching them to your students:
- What are my lips doing?
- What are my teeth doing?
- What is my tongue doing?
- What is my voice doing?
- How is the air flowing?
When students are making a sound, go through these 5 questions. Model these for your students to they can try to mimic you. Some phoneme card sets include the visuals of the mouth to help with this.
I give my students a small mirror so they can see what their lips, teeth, and tongue are doing. This is really helpful for them to notice the slight differences in the phonemes, especially when working on vowel sounds.
Don’t add a schwa sound!
It’s very important to correctly model the sounds. One mistake many people often make is adding the schwa (the /uh/ sound) after a consonant. For example, T makes the sound /t/ but sometimes people add an /uh/ and say /tuh/. It’s very important we’re not adding that /uh/ sound when teaching phonemes.

2. Don’t introduce similar sounds in sequence.
Because some sounds are very similar, it can be confusing for students to learn them in sequence. This is often the case with short e and short i. Although the overall sequence for teaching all the phonemes doesn’t really matter, this is the one thing you want to keep in mind when planning out the sequence you’ll be teaching.
3. Display only the sounds you have taught.
As you introduce new sounds, you add those to your sound wall. Don’t put up a full sound wall with all the sounds at the beginning of the school year!
4. Add words with the different spellings of that sound – but only the spelling patterns students have learned.
As you introduce new sounds and spelling patterns, add words next to or below the phoneme card. This helps students remember that different spelling patterns make the same sound.
5. Use the sound wall for quick daily review.
Every day, take a few minutes to quickly go through the sounds on the sound wall before introducing any new sounds, if doing so.
6. Show students how they can use the sound wall as a reference for reading and writing.
Model for students how they can use the sound wall to help them decode and spell words. You can also provide them with a mini sound wall that they can have in their desk or notebook.
Tip: If you want to see a great free presentation on sound walls, I suggest Michelle Trostle’s Sound Walls 101. She explains each step of the sound wall, the sound types, and makes it all come together for anyone new to sound walls.
Where to find sound walls?
You can certainly make your own by printing out phoneme cards and laminating them. You’ll need to add example words for each sound as well, so flashcards with a picture of the word are best for this.
You can try using my free virtual sound wall (pictured below) here.

If you prefer a ready-made set, Tools 4 Reading is an excellent option, but pricey. I also created my own sound wall and mini sound walls (pictured below), which you will need to print, laminate, and cut. This is much cheaper than the Tools 4 Reading set.
Shop my sound wall resources here.


Here are how some of my sound walls are being used in classrooms:
Special education teacher Mikayla Jorgenson’s wound wall:


SCIENCE OF READING QUICK START GUIDE
Grab your FREE guide with the 5 tools you need to get started with SOR!
*Most school spam filters block my emails, so please use a personal email.
Want to remember this? Save Why You Should Switch To A Sound Wall to your favorite Pinterest board!